
Building websites for your online business comes with a myriad of options to choose from that it is often overwhelming that most are tempted to purchase from the first website they come across. And if you have looked into e-commerce software, chances are that you’ve bumped into Shopify.

Shopify is a cloud-based SaaS (software as a service) shopping cart solution that can handle everything from marketing and payments to secure checkout and shipping, so you can leisurely focus on the things you are passionate about in your business! It is an amazing “one-stop-shop” for e-commerce business owners.
Shopify is one of the preferred e-commerce software for more than 600,000 businesses across 175 countries! Buying your website from Shopify is the easiest, inexpensive and most convenient way for a business to set up an online store and start selling their products or services online immediately without any fuss.
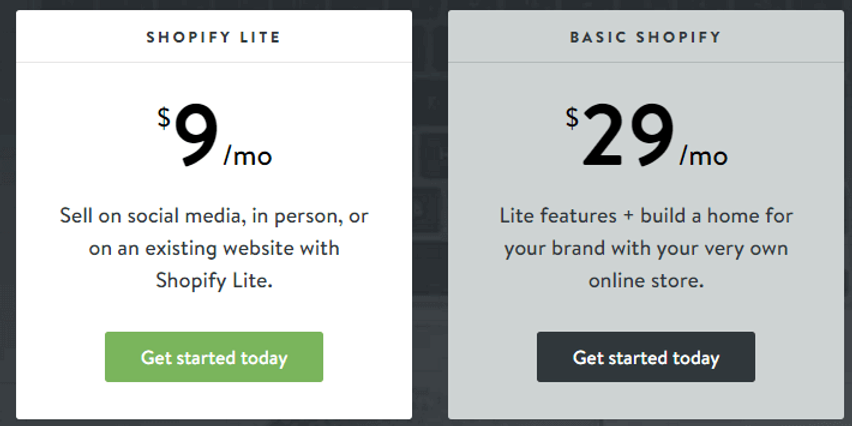
And exactly how is it inexpensive? With Shopify, it’s possible to run a complete online store quickly for as low as $29/month! And you can start a store with association with social media platforms like Facebook in as cheap as 9$/month compare this to setting up by yourself or buying a physical store, and other terrifying complicated logistics!
Another reason to consider Shopify is if you have outgrown marketplaces like eBay or Amazon, and just starting but you aren’t Tech-savvy enough to start from scratch, yet you want your own e-commerce store, and go with Shopify.
Now we’ll see how to set up the Shopify from scratch, there are few steps in creating the storefront –
1. Signup with Shopify
Visit Shopify.com. Use the signup form to create an account. Once you have entered the required details, you can click on the “Create your store now” button. From there, you will enter your business email and create a password. This is also the step where you will create your store name. After this, you’ll be asked to fill in a few more details, including your name, address, country and a contact number. You will also be asked if you have products and, if so, what your store will be selling.

If you only intend on a trial of Shopify, to see if it works for you, you can choose your choices accordingly, like in the” Do you have products?” dropdown choose “I’m just playing around”, and in the “What will you sell?” section choose “I’m not sure”. Once complete, click “I’m done.”
2. Set up your online shop
Now, you’ll be directed straight to your store admin screen. This is your e-commerce business command centre! Once you are at this step you are ready to start customizing your store, uploading products and setting up payments and shipping.

This is the fun part and Shopify makes it really easy to set up, so get creative and efficient!
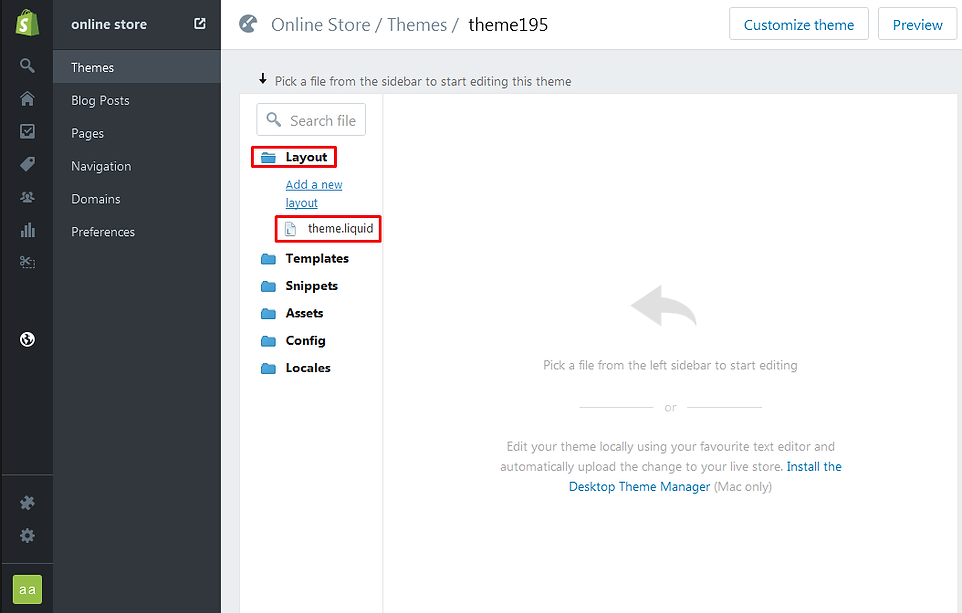
3. Choose a Shopify Storefront theme
No business is ready if they do not have their branded storefront up and running! Shopify can make branding and storefront e-commerce website design of your brand easy with its customized templates.
Shopify even has its own official theme store. All themes come with a holistic list of customizations you can make without having to code a line. Shopify theme templates have a full support design team and self-help articles to help you. If you are still stuck somewhere, Shopify chats ensure you are in good hands

Of course, the premium themes come with even more customisations, but you can still achieve a great looking site with a free one. These changes are outlined in the next section. If you want to make extensive customisations to a theme, there are very few limitations on what can be achieved by accessing the HTML and CSS.
If you do not have coding knowledge or you don’t want the hassle of dealing with customizing code, Shopify also has “Shopify Experts” that you can hire to take that headache away! Customization has never been so easy!
- Once you’ve found a theme you like, click the green button. Shopify will ask you to confirm your choice – click “Publish as my Shop’s Theme.” After the theme has installed, Shopify will alert you and it’ll show up in your published themes.
2.Now you just need to drop in your businesses customized logos, fonts, product photography, videos and other personalized content! The most common features will include :
- Logos
- Slider High-Quality Images
- Product and Collection Images
- Colour Schemes
- Fonts

4. Add your Products
Once you have your site exactly how you want it, it’s time to add your products!
Navigate the bar on the left to click on “products.” You will then see an ‘Add a product’ button in the top right corner of the page. Add as much detail as needed about your products in the next screen.
To ensure you can sell your product to the right customers, ensure that you write detailed, descriptive and helpful information about each product, also pay close attention to how you can plug in keywords, descriptions and URLs that will help your SEO.

You will soon be guided to the screen where you can upload product pictures and rearrange them as required. Make sure to upload your clear, professional and high-quality images of your product.
Ensure that your images are consistent in terms of styling and sizing unless you want it to look like a dysfunctional. Simple is always best along with a few styled images.
Always remember to click the “Save Product” button in the top and bottom right corners to ensure you don’t accidentally lose any product.
5. Add Payment method
Now that your products and e-commerce website design are all set up, let’s get started on setting your payments up!
A “payment gateway” lets your customers make purchases on your Shopify storefront. While the price and commission rate is important, it’s also important to see what features they offer.
Shopify offers 70 payment gateways (credit cards are also accepted). It will handle taxes, adjusting them automatically to a particular country.

Here are a few things to consider and understand when trying to figure out which one is best for your Shopify storefront:
- Transaction Fees: When you receive a payment, Shopify will keep a small percentage or flat fee (or sometimes both) for letting you use their service.
- Card Types: Make sure that you are aware of what types of cards are accepted by your chosen Payment Gateway. It is generally understood that nearly all payment gateways accept VISA and Mastercard, and most accept American Express. Paypal and other UPI id’s like Gpay are also becoming more popular for online payments.
- Offsite Checkout: Some Shopify themes allow payment from other servers. This means that the customer is taken away from your checkout which might seem a little inconvenient and unsecure.
Using Shopify Payments will mean pay no transaction fee, however, if you choose an external payment gateway, there will be additional fees of 2%, 1% or 0.5% for our Basic Shopify, Shopify, and Advanced Shopify plans, respectively.
Complete your payment setup by clicking the “Complete Shopify Payments account setup” button found in Payments under the Settings tab.
6. Go “LIVE”
One last step before you make your Shopify storefront LIVE and ready for customers you need to remember to fill out the last important things!
Taxes
- Go to the Products page of your admin panel.
- Click on the name of a given product.
- Scroll down to the section called “Inventory & variants.” Click on the edit link next to your “Product Variant” to open a dialog window.
- Make sure the checkboxes next to “Charge Taxes” and “Requires Shipping” are checked if you need to include these with your products.
- If you are planning to ship your product to customers, make sure to enter the product’s weight in the appropriate field.
Shipping
Make sure your shipping options are helpful and varying to customer’s needs. As you are competing with services like Amazon Prime, especially in this age of instant gratification, be reasonable and practical with your shipping methods. If you do not, you might lose out on sales!
Shopify calculates a shipping rate for your customers based on the rules that you have defined in the Shipping page of the admin. To set that up correctly, check out your shipping plan by going to the Shipping page under the Settings tab.
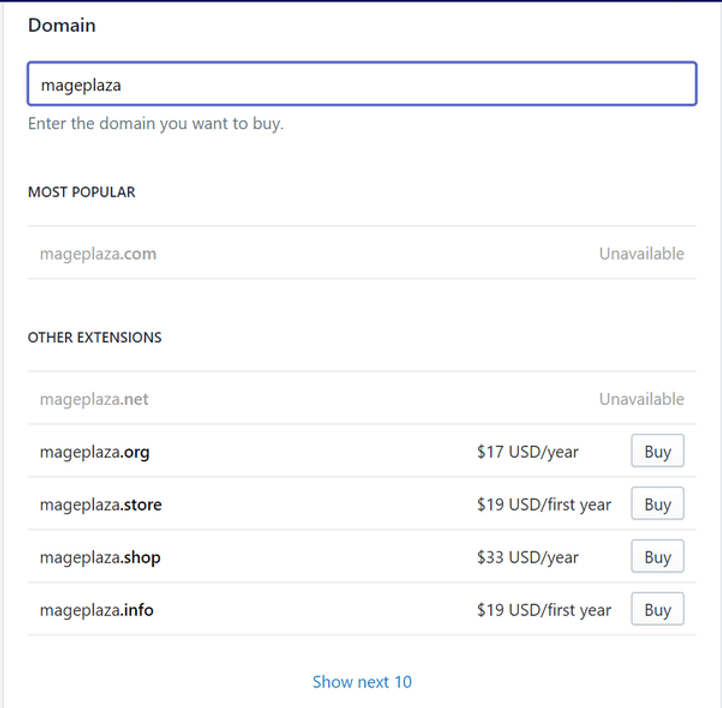
Consider Buying a Domain Name
Unfortunately, Shopify does not provide a domain name service automatically. To get a customized domain name, it is best to look at a hosting website or buy a domain name directly from Shopify. Buying from Shopify will typically cost you anywhere from $9-14 per year. The only difference is a third party domain name will require you to redirect the DNS records yourself which can be a small headache.
Shopify is an excellent shopping cart for most online merchants. It’s easy to use interface, reasonable pricing model, and beautiful themes make it one of our favourite eCommerce solutions. Your own experience with the software is more valuable than any advice I can give. Best of luck and Start your business with Shopify.
If you are looking for a digital marketing agency in Chennai to help with website development, head over to Bunjy.co! We can help service all your digital marketing needs.